Managing projects
It is a common use case that one needs to modify the users/egroups with access to a shared project, or transfer the ownership of a project.
These actions need to be performed using specific methods.
- Ownership changes can only be performed on the "CERN Resources Portal".
- Access to projects can be run using the CLI and/or the OpenStack website
- Setting default landb-mainuser and landb-responsible or provide access to supporters can only be performed in the OpenStack website
Change ownership on the Resources Portal
You can access the project resources under the "Cloud Infrastructure" service.
If you are logged in, a list of the OpenStack Projects owned and or administered by you will show up. For security reasons, only the owner of a project or member of an administrator group can perform actions on the project, so if the project you are interested in modifying does not appear, please contact the owner directly and either ask her/him to perform the desired action.
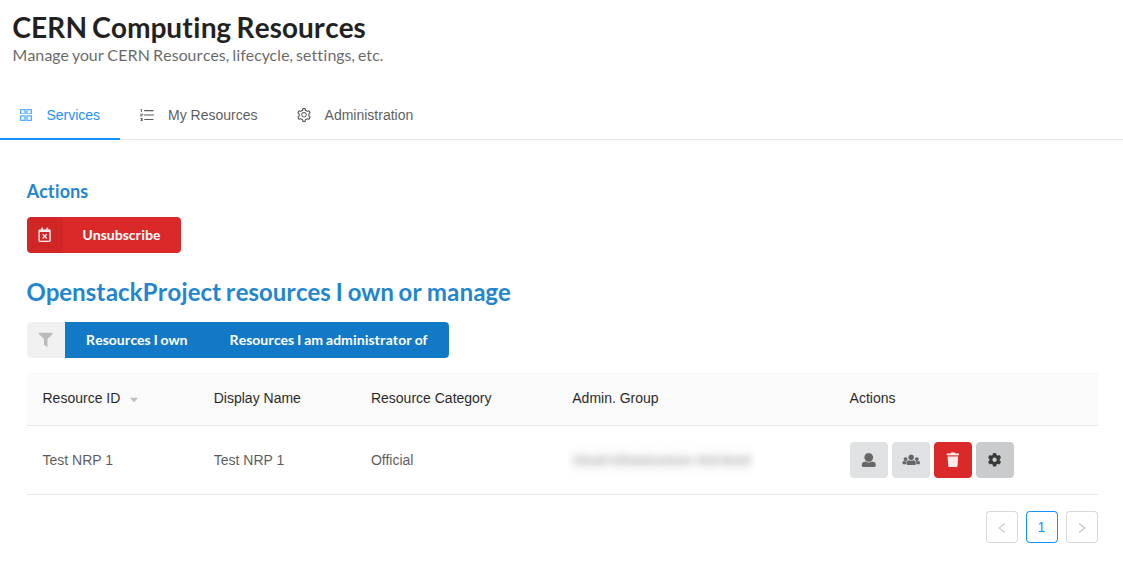
From here you can perform several actions such as:
- Change the owner of the project
- Change the administrator group of the project
- Within OpenStack this will grant the selected group the coordinator role
Setting default landb-mainuser and/or landb-responsible in a project or allow access to supporters
Note
Setting the project property does not modify already created instances. If you want to modify it on those you need to explicitly set the VM metadata property on all of them.
In the OpenStack website, if you are the owner or coordinator of a project you will have access to the Configure Project workflow where you can set the default values for landb-mainuser and landb-responsible on a project.

After clicking on "Configure Project" a workflow will appear, the details pane will show information about the project.
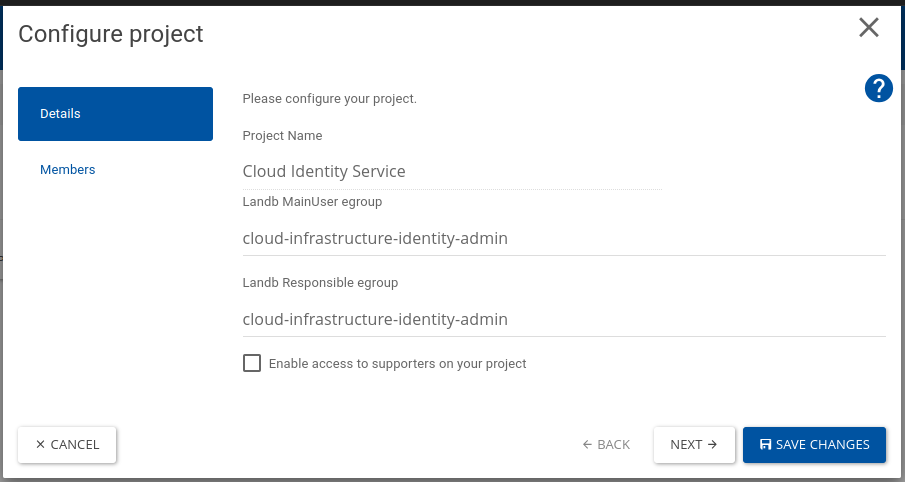
Input values are validated and it will only be applied once you have clicked on the "Save Changes" button.
When a VM creation request is made, the API looks (in the field exists, it is used, if not it continues with the next step):
- VM metadata property specified at creation time.
- Project property when the VM was created.
- User that triggers the operation.
Change access to projects using the Openstack Website
In the OpenStack website, if you are the owner or coordinator of a project you will have access to the Configure Project workflow where you can modify the ACLs on the project you are in.
After clicking on "Configure Project" a workflow will appear, then you can click the members pane that shows access control lists for the project.
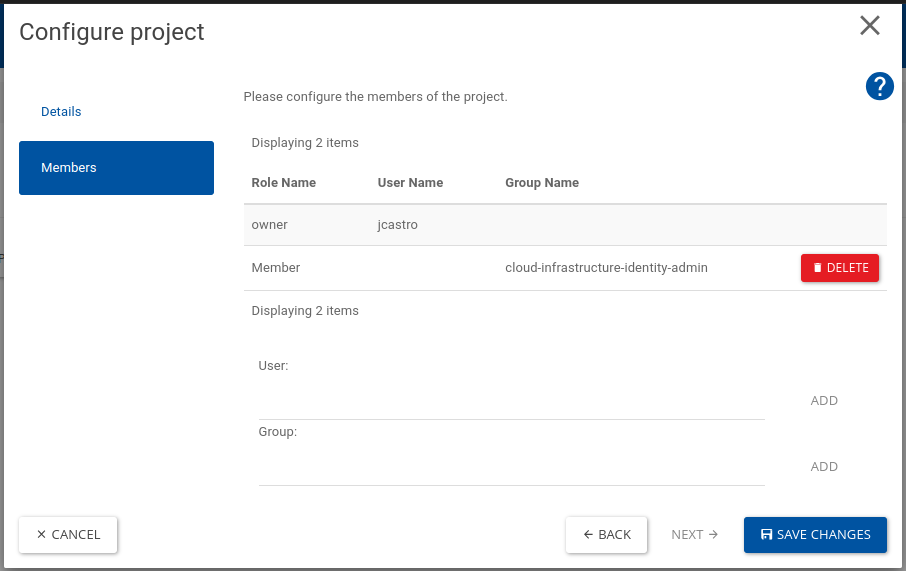
In this workflow, the Delete buttons allows to remove access to a user or a group. If you want to add a user or a group, please input the username or groupname on their respective fields, then it will be validated and if valid it will enable the add button to add it on the list.
Please remind that values will only be applied once you have clicked on the "Save Changes" button.
Change access to projects using the CLI
If you are the owner or coordinator of the project, or if you are one of its members, you can manage the ACLs using the CLI. As member you can view the ACLs on the project you are in. Adding or removing ACLs need always the owner or coordinator role.
First you need to point your environment to the project you want to look at
Warning
You can only look at the ACLs of the project you are connected. If you receive a Unauthorized Message, please check your environment.
If you have any role in the project like owner and/or Member, you can list the ACLS by typing:
$ openstack role assignment list --names --project 'My Project'
+--------+----------------+-------------------------+-------------- -----+--------+--------+-----------+
| Role   | User           | Group                   | Project            | Domain | System | Inherited |
+--------+----------------+-------------------------+--------------------+--------+--------+-----------+
| owner  | myuser@Default |                         | My Project@Default |        |        | False     |
| Member |                | this-is-a-group@Default | My Project@Default |        |        | False     |
+--------+----------------+-------------------------+--------------------+--------+--------+-----------+
If you want to see all the members by expanding the groups you can use the --effective parameter
$ openstack role assignment list --names --project 'My Project' --effective
+--------+----------------+-------+--------------------+--------+--------+-----------+
| Role   | User           | Group | Project            | Domain | System | Inherited |
+--------+----------------+-------+--------------------+--------+--------+-----------+
| owner  | myuser@Default |       | My Project@Default |        |        | False     |
| Member | myuser@Default |       | My Project@Default |        |        | False     |
| Member | user1@Default  |       | My Project@Default |        |        | False     |
| Member | user2@Default  |       | My Project@Default |        |        | False     |
| Member | user3@Default  |       | My Project@Default |        |        | False     |
+--------+----------------+-------+--------------------+--------+--------+-----------+
If you have the owner or coordinator roles, you can add users or groups to the project with the Member role.
At this moment the Member role is the only one available to be configured by end users.
If we want to add the user4 and my-other-group to the project, we can use the following commands.
$ openstack role add --user user4 --project 'My Project' Member
$ openstack role add --group my-other-group --project 'My Project' Member
To remove these users, we can use the following:
$ openstack role remove --user user4 --project 'My Project' Member
$ openstack role remove --group my-other-group --project 'My Project' Member
To list the roles on all projects where we have the owner or Member role: