Windows guest specific procedures
Creating Windows Desktop Machines
The OpenStack Windows 11 image provided by the Windows Service need at least 100GB of disk space to ensure a smooth upgrade and maintenance of the system.
In personal projects, this disk requirement is greater than the default flavors available. In such projects, users
need to boot machines from volume to accommodate the installation of Windows.
To ensure a smooth operation of Windows clients, personal projects allow since the first quarter of 2024 the
creation of an io1 volume of 100G. This volume is more performant than the standard type and it is recommended for this use case.
Use cases requiring more resources than the default quota must request a shared project with the desired amount of resources,
as well as access to io1 or any other available volume type.
Configuring with CMF
Windows configurations can be automatically configured with CMF. You just need to pass one of those properties at creation time of the machine
| Field | Description |
|---|---|
| cmf-nscmems | NSCs in which the instance will be member of |
| cmf-osrole | OS Role of the machine in CMF |
Mounting Volumes
Once you attached a volume to a Windows instance, you'll need to format it before the first use:
-
Launch Disk Management by using any of these methods.
-
On a Windows 11 instance, Use the Windows key + X keyboard shortcut to open the Power User menu and select Disk Management.
- Run the program ‘diskmgmt.msc’.
-
In File explorer, right click on This PC and click manage, the computer management program will launch, Disk Management is on the storage submenu.
-
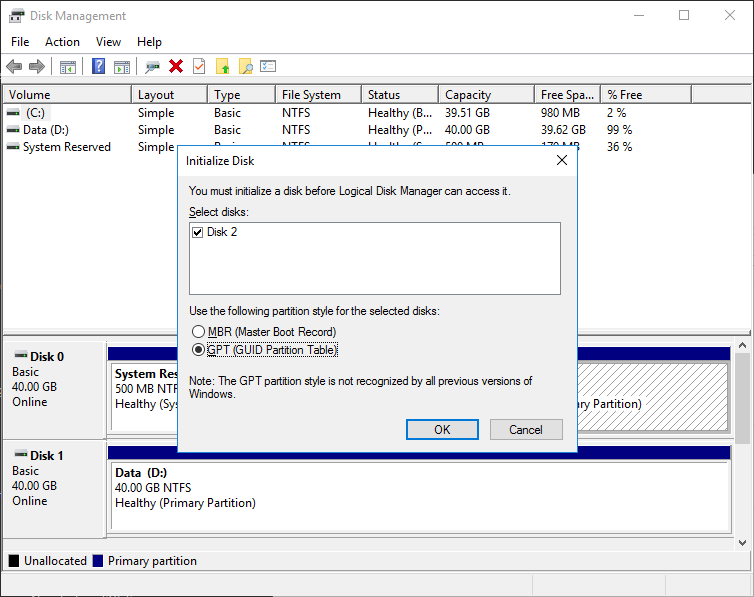
A popup will appear to initialize the disk. If that does not happen, right click on the not initialized disk (on the icon and label that says unknown) and select Initialize Disk.
-
Select GPT (compatible with all sizes of volumes) and click "OK".
-
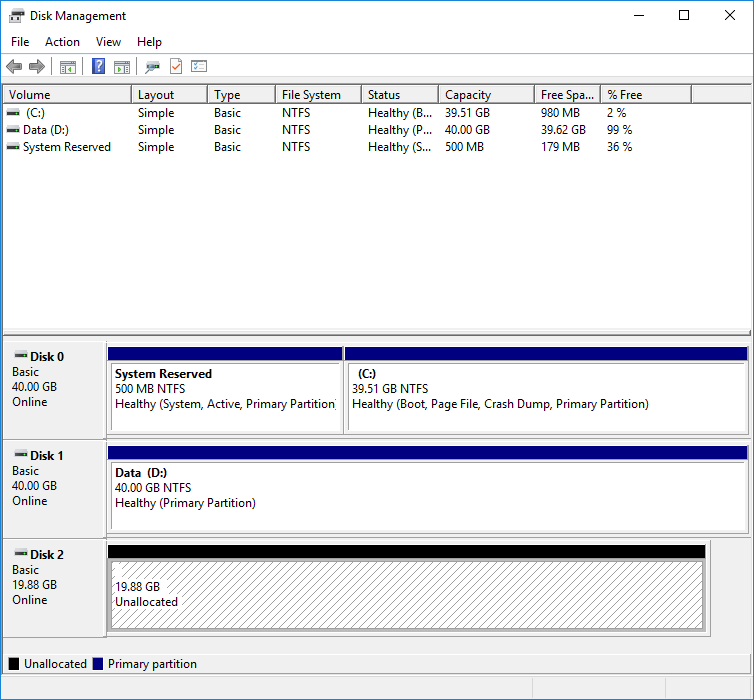
Now the volume becomes online and unallocated. Click on the unallocated space and select New Simple Volume
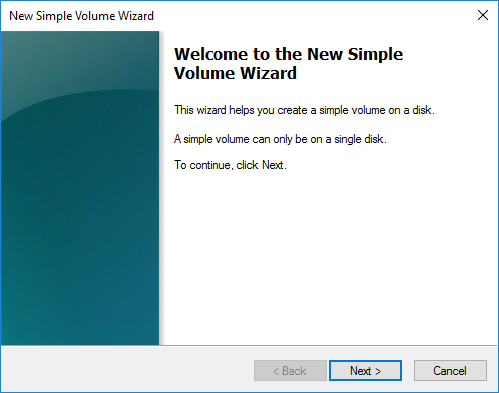
- Click "Next" on the first page of the wizard.
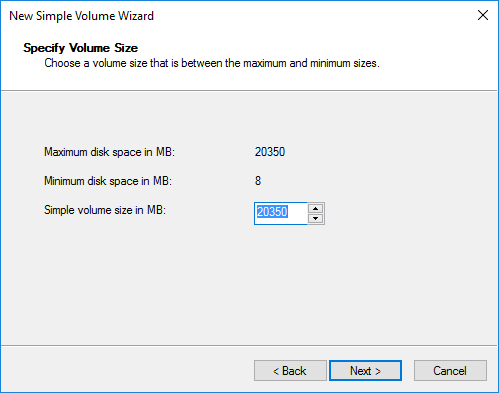
- Click "Next" on the size page of the volume (defaults to all volume size).
- Select if you want to mount it as a drive or as a folder (if it is a folder, it must exist beforehand and it should be empty). When finished click "Next".
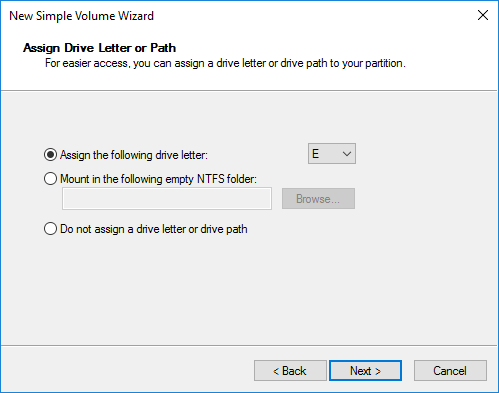
- In the Format Partition select NTFS and select the appropriate label that you prefer in order to proper identify it (if you have multiple volumes attached) and click "Next".
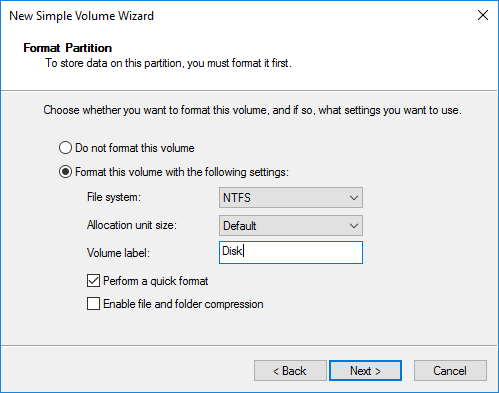
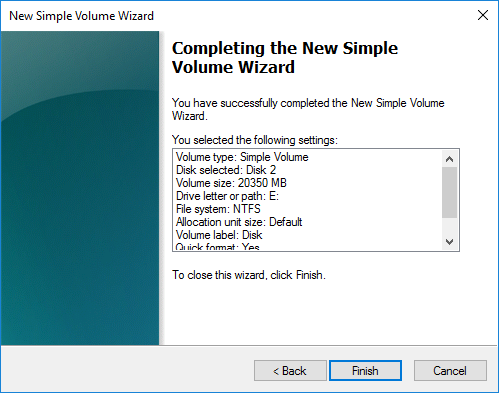
- Now you have a summary of all options selected. If you are happy with them, click on "OK" and the volume will be formatted and mounted as desired. The formatting step can take a couple of minutes, depending the size of the volume.
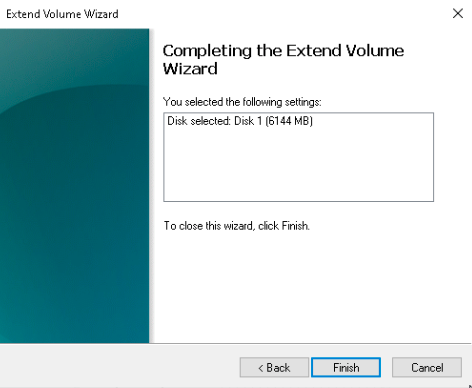
Extend Volumes
Once you have extended the size of a volume already attached to a Windows instance, you'll need to extend the filesystem to be able to fully use it.
-
Launch Disk Management by using any of these methods.
-
On a Windows 11 instance, Use the Windows key + X keyboard shortcut to open the Power User menu and select Disk Management.
- Run the program ‘diskmgmt.msc’.
-
In File explorer, right click on This PC and click manage, the computer management program will launch, Disk Management is on the storage submenu.
-
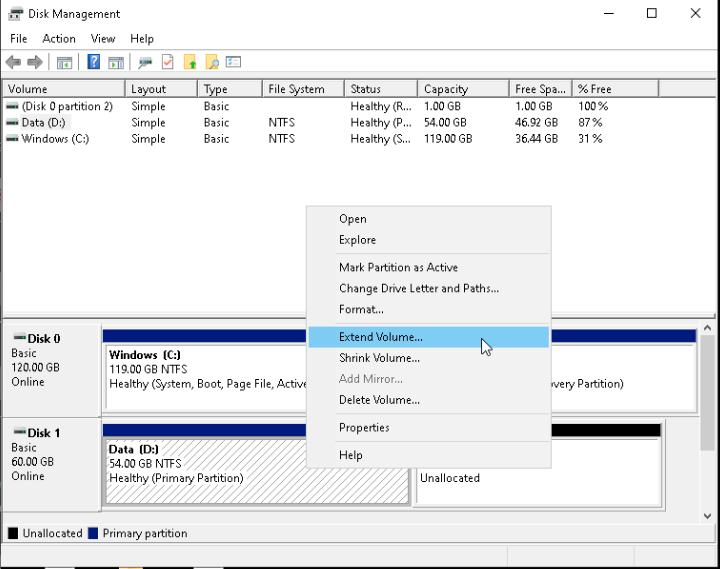
On the list of disks, you'll see the partition drive normally (C:) and an unallocated space on the right. Right click on the partition and select Extend Volume...
- Click "Next" on the first page of the wizard.
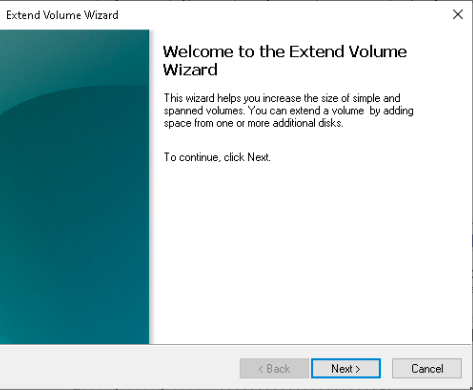
- Click "Next" on the size page of the volume (defaults to all volume size).
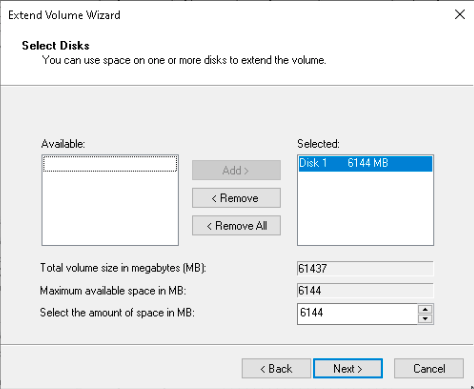
- Now you have a summary of all options selected. If you are happy with them, click on "OK" and the volume will be extended.
Local Administrator account
It is advisable to have set the password of the Local Administrator account for recovery scenarios.
Machines created from the public Windows images produced by the Windows Service are integrated automatically into the Windows Toolbox portal. Among other things, this portal allows the main user or responsible of the machine to discover the local administrator password using the LAPS tool.
Knowing the local administrator password is particularly important when creating machines from snapshots. If you restored a machine using a snapshot previously taken, it may break the domain join. In such cases the only possibility to log into the machine to rejoin the CERN domain is via the local administrator of the machine. In cases like this one, you need to set it up before the snapshot is taken.
In order to do so, you need to launch the 'Command Prompt' in Administrator mode in the virtual machine.
In Windows 8, 10, 2012 and 2012r2, you can right click on the Windows logo and select 'Command Prompt (Admin)' In Windows 7 and 2008 r2, click on the start button, type cmd in the Search program and files, and right click on the process and select 'Run as administrator'
Then you only need to type 'net user Administrator PASSWORD' replace PASSWORD with your desired password.
Once executed, you can take safely the snapshot.
Recovery process
If you've lost access to the machine after boot from a previous snapshot and you've already set up the local administrator password mentioned earlier, you can regain access to the machine via the console
- Please go to the website, select the machine and click on console
- Once there, press the button CTRL+SHIFT+SUPR in the top right corner
- Click on other user
- And then type '.\Administrator' and the password you've set previously on the 'Local Administrator account' section
Once you've logged in, in order to rejoin the CERN Domain, you need to remove the existing domain information by disjoin the domain, and then join it again.
- Right click on 'This PC' in Windows Explorer and select properties
- Then on the System Properties window click on Change
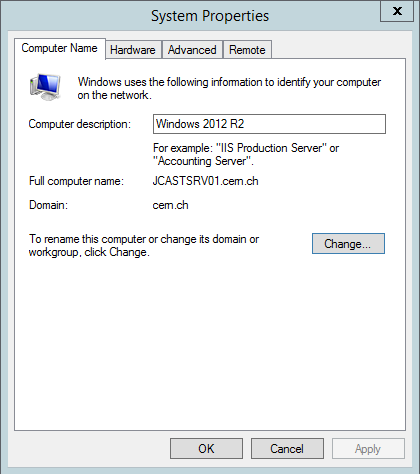
- Then click on 'Change...'
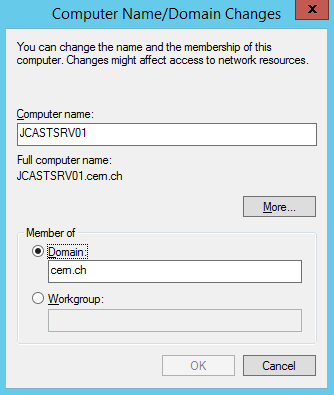
- Change 'Member of' from domain 'cern.ch' to workgroup 'NICE'
- It will ask you for your CERN password to leave the CERN domain, please type it and press OK
- When done you'll need to reboot the machine
- Once reboot it, log in again using the local administrator password
- We need to do again the previous steps 1-7 and change the 'Member of' from workgroup to domain 'cern.ch'
- It will ask you again for your CERN password to join the CERN domain, please type it and press OK
- When done it will ask you to reboot the machine. Afterwards, you can connect to the machine using your CERN credentials
Manage Remote Desktop access from outside CERN
In case you need access from outside the site to your Windows instance running in the Cloud Service, you could enable remote access from using the remote desktop gateway. You can configure it using the following link
Trim unused blocks in the filesystem
The hypervisors are equipped with NVMe devices and thinly-provisioned volumes that support the discard functionality. VMs hosted can use this functionality to remove blocks in the filesystem that are no longer used. You can trim unused blocks by executing in an elevated prompt: